Thursday, August 26, 2010

ISTE

The International Standards for Technology in Education is an association created for educators to help provide assistance to incorporate technology in the classroom. They are committed to providing engaging and effective learning through technology and assistant teachers in technological classroom advances in the PK-12 profession.

This websites provides interesting videos to help teachers include technology and use it effectively in the classroom. I have not watched all the videos but they have multiple videos for different stages of learning and different content areas.

http://nets-implementation.iste.wikispaces.net/Videos+of+NETS•S+in+Action

I also found an interesting WIKI like area where teachers can post and discussion different lessons, questions, or examples of technology in their classroom. I always find aspects like this interesting because it is first hand knowledge of what is actually happening in classrooms across the country.

http://nets-implementation.iste.wikispaces.net/Grades+9-12

There are also areas on the webpage that focus on periodical development and improving the teachers as well as how they present technology in the classroom.

To become a member of the organization there is a fee but it does get you discounts on books, social networking opportunities among other things. There is quite a bit of information you can still receive and utilize without being a member.

I found the standards on the website to be one of the most useful and interesting aspects. It helps set a standard as well as help teachers focus on the important concepts for learning about technology.


http://www.iste.org/Content/NavigationMenu/NETS/ForTeachers/2008Standards/NETS_for_Teachers_2008.htm

The Unseen Viewer

The Issue

Do you remember that contest in the mall that you entered your information into? Yeah, that green Ford Mustang that you have always wanted since you were a kid. What about that magazine subscription you fill out online just the other day? Did you know that in placing your information into those little boxes you are putting yourself on the auction block?

Companies buy and sell information for "marketing" reasons. They play by the idea that if you scratch our back by provide information that I can sell and also lower marketing costs then they will in turn scratch yours by lower the cost of the product. Is that worth it to have a duplicate of your self out there in a digital form, i.e. a digital profile? Do we have much of a choice?

Unless you plan on never using the internet, filling out a warrenty card, or any other type of form you should start thinking about how to limit the information going into your profile and being spread through the internet. While the places I mentioned that keep your profile doesn't sound too scary, think about all the people who have figured out how to tap into that digitial profile that are not for mere marketing reasons. They desire to do other things such as acquire your identity.

You can start right now and decide how you would like to limit this digital profile and the information sent out through the internet so no cyber vagabond or predator can acquire the information.

There are a lot of websites out there that will keep you updated on the big pictures of information privacy.

A lot of these issues apply to classrooms because of how connected to the internet/technology the students are connected while in class. I think a downfall of living in a digital age is that we can get desesitized to the dangers on the web because we are surrounded by the internet all the time. It becomes a normal part of what we do. Now we need to make it sure that saftey precautions are a part of the habit as well.


Safeguards

If you are going to use the internet in the classroom then the school should consider setting limitations on what can be accessed through said computer. The teachers should spend a little time, before letting them roam free on the computer, to talk about some saftey precations.

If you feel like your class is in need more education on the matter you can consider acquiring different tools, exercises, and informative video

Teachers and Administrattors can cut down on the digital profile growth by educating themselves on their computer software and paying attention to 1. their expiration date (virus protections),   2. the necessary updates for browsers and software and 3. privacy settings on websites. All of these things will mean you have the latest protection. There are constantly people out there, our internet vagabonds and predators, that are figuring out how to bypass the safeguards that have been created. If you use the updates then you are receiving the latest protection and ensuring to stay ahead of the hackers and those unwanted invisble viewers to your information. Take advantage of being able to choose your privacy settings in order to add to your filter and means of protection.

Teachers also need to ensure when they use such tools as wikis or blogs that they are not using too much personal information and allow for some anonimity on the web. Let them create their own user name while you maintain a list at home of who is who.


One of the biggest things students need to know about safe guarding their digital selves is to limit what is put in this profile. They shoud learn to filter. They need be aware of where they are putting their personal information such as addresses, full names etc... This might seem weird to them because of all the social networking options available and all the information that could be enetered in there. They need to be reminded to use the privacy settings to ensure that only those people they want to see their information has access to it.


Places for social networking are a whole different monster, but there are two concerns you can present to the students: Personal information theft (to be used for the wrong reasons) and the influence things on the internet have on a future job. There is a permancy to what is added to the internet.


Do you think there should be mandatory classes in school on how to use the internet? Should it just be little tips before projects and use of the computer or full blown lessons? Does your administration address these issues during the pre or post school year planning sessions? Should they?


If you want to keep learning more and some of the most up to date things you can do to protect your privacy then consider visiting the website or participating in the International Data Privacy Day.

Wednesday, August 25, 2010

The Lower Merion Webcam Incident and other tales of technology gone wrong in the classroom


Wasn’t technology supposed to make life easier?

In the 1950’s post-WWII boom of industry and technology, the future looked bright. We were promised that in 50 years we’d all be living in a world of flying cars, bullet trains, and enough hi-tech gadgets that the corny sci-fi fantasies of movies and television were to become a reality. It was a realistic vision to a certain extent, and while we don’t as of yet have flying cars, technological advances have become so ubiquitous and commonplace, it’s become highly integrated into the way we communicate with others and go about our daily business. All too often, we take it for granted.

Problems inevitably arise when technology makes life too easy, particularly for the classroom. New features on handheld devices or websites can quickly exploit the vulnerable and witless alike. Across the nation, the camera-enabled cell phones have led to rampant incidents of “sexting” between students, causing legal bouts between school officials and prosecutors over the extent of the law and school authority. Social networking websites such as Facebook and Myspace, not to mention cell phones and like devices, have enhanced the efforts of bullys to target their victims, commonly referred to as “cyberbullying”.

As is often the case when technology is either intentionally or intentionally misused, even the best of intentions can quickly become legal and ethical whirlpools of confusion and chaos. Case in point: the Lower Merion school district of Philadelphia. When the school decided to give each of its 2,300 students their own laptops (provided the students paid a small insurance fee against damage, a monitoring and tracking programming came pre-loaded on each of the students’ laptops. Seems harmless enough, right? And what a fine gesture by the school administration – each student has their own laptop now to better enhance their studies!

However, trouble began when the tracking software was activated which provided the school’s servers with the pinpointed locations of potentially missing laptops. The software kicked into gear and using the laptop’s built-in webcam began taking pictures of the students using the laptops, including screenshots of any programs that were running and what the students were doing – whether they were actually Lower Merion students or not!

After the pictures surfaced, allegations of student and teacher misconduct began to fly. By November 2008, one particular student “claimed that an assistant principal confronted him with a Web cam photo of him in his bedroom. The photo shows him with a handful of Mike & Ike candies, but that the assistant principal thought they were drugs.” Soon, the district attorney was on the case, with allegations that the school district had violated the students’ right to privacy, while the school district contends it was only intending to monitor for laptops that had been potentially stolen.

Sweet dreams: Homework always goes down better in between naps, right? ... One of the alleged webcam photos taken by the monitoring software.

Since the case broke, the monitoring of the laptops by the school district has been disabled. As legal woes continued over the summer, the district’s legal fees topped $1 million dollars. Finally, this last week, prosecutors announced no criminal charges would be filed in the case, although lawsuits from two students who were first tracked and monitored are still pending. Meanwhile, as they should have done in the first place, the school district has “adopted new policies governing how, when, and for what reasons staff will track the take-home laptops Lower Merion issues to each of its nearly 2,300 high school students.”

The Lower Merion Webcam Incident raises a few important ethical questions about the use of technology in schools, how it should be used and where it ought to be used. Obviously, the school district valued the students’ accessibility to technology that would help them in their studies. Why would they have purchased the laptops for the students in the first place? But perhaps they didn’t think this through. What prevents the students from allowing friends or unauthorized users to use the laptops? What if they’re stolen or sold? What will students be doing with the laptops?

Tracking and monitoring software would solve those issues, but then what of students’ rights? Shouldn’t students be afforded privacy when at home or away from school, away from laptops that allow school officials to “snoop” at what activities the students are engaging in at home?

I think there is a very good case here on either side of the issue, but ultimately, I think the fault rests with the school district for their shortsightedness. Everyone wants students to have access to technology that will make their lives easier (particularly low-income or at-risk students who wouldn’t have access to laptops). We value the enhancements that computer programs such as word processors and e-mail will bring to students’ learning. Perhaps the school district should have only allowed the students to “check out” the laptops with a sort of library/honor system rather than simply giving the students their own laptops.

Technology has enabled students to express their learning in many new and unique ways that were not otherwise possible. Advancements in speed and software applications have also made learning fun, accessible, and functional for students of all abilities and needs. Technology was supposed to make life easier, but for school administrators, teachers, and students, at what cost?

With great power comes with great responsibility…

Right? What do you think?

NETS and ISTE

The amount of technology that is available to our teachers and students can be overwhelming at times. Just finding a place to start, or a resource to help you begin can be very difficult. Mary Beth Hertz in her blog post entitled, “Getting Started with Technology Integration in Your Classroom” says the National Educational Technology Standards are “a great framework for planning lessons and projects that combine technology literacy with academic standards and critical thinking skills.” The National Educational Technology Standards (NETS) were created by the International Society for Technology in Education (ISTE) and can be found on the ISTE website. ISTE has created a set of standards for students (2007), teachers (2008), and administrators (2009). The ISTE website indicates that the standards “have served as a roadmap since 1998 for improved learning and teaching.” The standards are just one way that ISTE has been helping teachers implement technology into the classroom in order to enhance student learning. They are a very organized and detailed set of standards to assist educators in the classroom.iPad accessory
bm.iphone, “iPad accessory” April 10, 2010 via Flickr, Creative Commons Attribution

ISTE is a legitimate professional growth opportunity. ISTE offers a variety of resources to assist the educator including an online magazine, webinars, newsletters, and a very large annual conference and exposition. I know of many educators who attended this year’s annual conference in Denver and were quite impressed with the amount of connecting, sharing, collaborating, and learning that took place during the conference. It appears to me that the annual ISTE conference is one of the premier technology conferences available to educators. Joining ISTE is as simple as going online, submitting a membership application, or calling on the phone. In another blog post entitled "Is ISTE Still Relevant for Young Educators?", Mary Beth Hertz talks about some of the value of being a member of ISTE, whether you are a young educator or a "proven veteran." The benefits from ISTE can be seen by all teachers.

Philly Teacher (Mary Beth Hertz) / CC BY-NC-ND 3.0

Where is our line in the sand?


To use Facebook in the classroom or not use facebook in the classroom, that is the question. In our weekly announcements at Andersen Middle School we were informed that our school now has a Facebook page. I was really excited! BUT then I began asking myself many questions about where our district stands on using facebook in the classroom, and outside of the classroom. Facebook is blocked for both students and staff during the school day. So I suppose they allowed the district to set one up more so for general school information and communication purposes.


In a search for answers I sent an email to the Director of Human Resources asking if our district has any written policies about interacting with students on Facebook. In his response he stated that we don’t have a “policy regarding the specific use of Facebook or other medium.” He did however attach the link to our code of Ethics. Needless to say I didn’t find any real answers in this document. It served as more of a general reminder as to what good ethics are as an educator. He also copied in his response to the Executive Director of Technology and asked for her feedback.


This is certainly a hot-topic in our district because the Executive Director of Technology thanked me for posing the question and explained that in new-staff orientation they shared “pitfalls of using social media in the classroom and what may get you in trouble.” Her recommendation was in regards to using your personal Facebook account to interact with students. She tells all teachers not to friend any students enrolled in our district until after they graduate. I did think this was an important message to send however I was still left wondering how the district feels about teachers using Facebook as a classroom tool. So I replied with a request for more information. I will keep you posted via comments as soon as I hear a reply :)


Monday, August 23, 2010

ISTE & Ethical Dilemmas


According to there own website the ISTE is "engaged in improving learning and teaching through the effective use of technology". After looking over their website two things become quite apparent; 1. They are making every effort to help with an issue there is very important in education today; the ue of technology. 2. They seem to be experts on the subject. All the research and data I could find concerning this organization showed me that they are clearly the authroity in this area of education. In fact no other organization really seems to compare in knowledge and professional presentation. The website for the ISTE include many very useful links including the background and development of the program as well as links for professional development and other helpful publications regarding the topic of techology in education.


A simple yet major ethical dilemma facing educators today is the sharing of software. In most cases the sharing of software programs that have been purchased from a retailor is illegal and often enough such sharing is blocked through product identification. However there are man cases in whcih sharing is possible. The question then becomes is this stealing? No teacher would want to be knowingly committing a crime to better their classroom would they? The answer may seem obvious to most, of course not. Teahcers and schools should be examples of ethical uprightness to parents and kids alike. However I ask the question, what is a teacher to do if the school simply can't afford another copy of the software? Are they to decrease the oppurtunities for students using technology? Again the ethical answer maybe obvious but I would venture to say that temptation is always there, when copies of programs are avaliable. To me there is no easy answer, a teacher always wants the best for students, but at what cost?


Finally I would like to address some of the "Educator Resources" that ISTE provides. First of coures is a great variety of books and electronic resources that help teachers integrate technology. Along with these are numerous peridoicals that schools and eductors can subsribe to. Another usefule product that the ISTE can provide is what they call an "Advocacy Tool Kit". This kit provides educators with a step by step process of how to bring technology into schools are extremely lacking. Along with their many print resoures ISTE provides pod casts, article archives, and many more online tools for research and development. Finally ISTE include a calendar of technology events, to encourage teachers to continue their learning in person at various sites around the country.

Week 4

Our Blog through Wordle

Hello all!

First, let me say that the technology tutorials were all done very well! It was interesting to see the variety of formats used from wikis to youtube videos to powerpoint to a PDF uploaded to Scribd!  Part of my goal on the assignment was to demonstrate the various technologies we can use to teach technology.  Well done!

Second, I just wanted to remind everyone that this week we'll be going back to the blog post format from weeks 1 & 2. You should be able to find the topics on blackboard. Please post your topic ahead of time on Blackboard so we can avoid duplication.

Third, I wanted to remind you that your grades are posted on the blackboard gradebook. Please let me know if you have any questions or if I made a mistake in recording your grade.
Flickr - Terry Hart, Creative Commons License 

Finally, on Sunday, your final paper topic prompt will be available on Blackboard.  Here is the information about the paper from the syllabus:

Final Paper: Your final paper for this class will be a minimum 10 page research paper answering either one of the suggested prompts or writing your own prompt.  If you decide to write your own prompt it needs to be approved by your instructor by Aug 28.  Your paper should have a minimum of 10 sources of which 5 should be online resources (such as blogs, web resources, etc) and 5 should be offline resources (such as newspapers, magazines, books). Please see the rubric on the assignment for grading criteria and more details on the assignment.
So if you have an idea for what you'd like to write your research paper on please let me know through blackboard.  Otherwise pick from one of the topics posted online.  Also, please note that this is not like the weekly papers you have been turning in. This is a research paper which should be a capstone on the class drawing from what we've covered this month.  The final paper will need to be turned in through Blackboard by Saturday, September 4th by noon.  Note that the final paper, at 100 points, is worth roughly 25% of your grade in the class.

Please let me know if you have any questions - I've enjoyed working with all of you this month!

Friday, August 20, 2010

Trying again!

Photoshop Lesson

Facebook for Teachers and Students

This tutorial for Teachers is a 10 step guide to setting up a Facebook account. You would be suprised how many teachers don't know how to use Facebook...! The Student version is more of a CAUTION to students on what not to do on Facebook, although it is set up in simple steps like the teacher guide... My tutorials were created in power point so I have sent them to you via e-mail. Please comment on the blog if you desire...

Online literature circles


One of my goals in my reading class this year is to implement an online discussion forum for literature. For my tutorial I chose to focus on using online literature circle discussions! This gave me an opportunity to coach myself on how I need to go about establishing the forum in my classroom. Perhaps it may encourage you to do the same!


Lit circle tutorial
http://static.slidesharecdn.com/swf/ssplayer2.swf?doc=litcircletutorial-100819123845-phpapp02&stripped_title=lit-circle-tutorial" />http://static.slidesharecdn.com/swf/ssplayer2.swf?doc=litcircletutorial-100819123845-phpapp02&stripped_title=lit-circle-tutorial" type="application/x-shockwave-flash" allowscriptaccess="always" allowfullscreen="true" width="425" height="355">
View more presentations from Claudia Wickham.


Thursday, August 19, 2010

Notebook Software

smartboard
popofatticus, “smartboard” September 18, 2008 via Flickr, Creative Commons Attribution

The SMART Notebook software is a very effective software for creating lessons for the SMART Board. I wrote about the benefits of a SMART Board or an interactive whiteboard (IWB) on my blog this spring:
Within a classroom a variety of learners sit in their desks. The class is split between visual, auditory, and tactile learners. In addition to the different learning styles, the students have different abilities. And finally, the students have different interests. With all of these students, one teacher must mesh all of the diversity together into one effective learning environment. A SMART Board is a tool that can help a teacher to do this successfully.

Over the past two years, Zion Lutheran School has been blessed by being able to purchase 11 SMART Boards for our classrooms. A SMART Board is an interactive whiteboard that allows users to touch, write on, and view images that are being projected from a computer. This tool that can provide a teacher with many options for instruction and give great variety to lessons. Some of the benefits of SMART Boards in the classroom include:

Lessons can be created to easily include videos, music, graphics, games, and interactive activities.
Teachers can model a variety of effective note taking methods.
Teachers AND students can use technology to collaborate with others in the classroom or all over the world. The SMART Board can assist with many types of collaboration.
Teachers can print or email a lesson to a student who is absent and missed class.
Lessons can be created to provide an effective flow and sequence with prepared leading and discussion questions.
Many different graphic organizers (tables, charts, and Venn diagrams) can be used to categorize ideas, concepts, and data.
Technology integrated into instruction can take a classroom, bounded by four walls, and open it up to the world. SMART Boards are one example of how we can integrate technology into education and are one step toward technology having a positive impact in the classrooms of Zion Lutheran School.

Picciotto, Henri. (2010, March 27). Interactive white boards. Retrieved from http://blog.mathedpage.org/2010/03/interactive-white-boards.html

Using Technology with classroom instruction that works. (n.d.). Retrieved from http://docs.google.com/present/view?id=dd78ng6q_73fcr94wgt


Below is a tutorial for students or teachers using Notebook software.

TUTORIAL PART 1


TUTORIAL PART 2


TUTORIAL PART 3


Interactive Whiteboard/SMART Notebook Resources
SMART Board Revolution Ning

SMART Exchange - Find Lesson Plans for Your SMART Board and Connect with Teachers

Interactive Whiteboard Insights [Blog] - Put more interactivity in your interactive whiteboard!

Diigo page of SMART Board Resouces


SMART Board Resources

Benefits of a SMART Board

Photoshop, blogging, and me

Oh the things I am learning!

To create my photoshop tutorial I made a PDF that you could click through to get to the different parts of the lesson. Sadly, I am finding that you can not post a PDF into the blog. SO... I have uploaded it to a different area of the web and you can find it at the following web site. From there you can either view it or you can download it and actually interact with the PDF.


http://docs.google.com/fileview?id=0B2jJqj1v5QpVMGI2M2M2MDUtZjNiNS00ZTkxLWJjNzAtZDA4MmRiYTM4NGYx&hl=en
Blog+Art =Conversations
I made the tutorial using wikispaces. I tried to use powerpoint, but I'm a little rusty and got frustrated. I also really enjoy the wikis. They are easy to use and I think they are designed more for the digital students then a powerpoint is anyway. Oh right, I'm talking about blogs not wikis :-p
Hi-Ho Wiki!


There is a link in there for my example blog, but I'm going to add it here also for easier access
Miss. K's art class

FYI- I realize I never told everyone who this crazy person is with the title Bellybuttonlint. If you haven't guess through process of elimination, this is Rebekah K. I know my user name is funny, but I made is up as a silly late night thing and have not change it yet.


Wednesday, August 18, 2010

IMovie

This week, I decided to tackle IMovie '09, which I spoke of briefly in last week's post. I'm fairly familiar with it, and unlike alot of other software applications that maybe only do one thing or another, IMovie is open-ended and versatile enough that it's well-suited for any user (teacher or student) to do just about anything they might conceive of in the classroom. As you'll see in my tutorials, I tried to go into a bit more detail for the teacher tutorial and be as brief and succinct as possible for the student tutorial. This way I figured the teacher could have more of a background and be able to point out the features of IMovie to the students, while the students can have more of a free-range experience, experiment, and try out some of the plethora of tools and effects.

I wanted to mention that I used a neat little Mac application called Screenium to create a video of my actual laptop screen so you could see not just me but me actually demonstrating IMovie '09.

Teacher Tutorial Part 1


Teacher Tutorial Part 2
(Forgive the weird formatting on this one - I'm half cut off after I edited in IMovie, imagine that!)


Student Tutorial


References

Using IMovie to Enhance Learning

A media specialist at Kate Sullivan Elementary School in Tallahassee, FL presents an practical guide to using IMovie in the classroom, although her focus is more on elementary school students and the projects their teachers have designed for them with IMovie specifically in mind. Some excellent projects and suggestions!


Powerpoint Presentation on IMovie in the classroom

This instructor brings up a very good point about compatibility and conversion. Some students may not have Mac's, and in this case it might cause a compatibility issue for the student to continue working on their project at home. Also, third-party video converters such as VisualHub are not always readily available to students, and are sometimes difficult to access on the internet. The Apple website offers several video converters that can assist converting between video formats.


Sample IMovie Lesson Plan

An example of a lesson plan using IMovie and Comic Life, which is a photo template creator in which you can add splashy comic book effects as the title suggests. I like how this lesson plan integrates a field trip with IMovie, where students can document everything they see and hear at the museum and reframes their learning in a way that's interesting and fun - long after they've left the museum. A great listing of resources and a keen consideration of all the tools students will need to create the finished project.


Tips & Tricks for IMovie '09

Like I mentioned in the teacher's tutorial, IMovie is what you make it, so you might as well make the most of it! Techradar.com offers 10 IMovie tips - some I was aware, others I was not. But as I've found in working with IMovie, if there's a certain effect you want to achieve it's best to simple Google it, and most times you'll find your answer. I like how this website suggests space saving tips for your hard drive, as IMovie is a bit notorious for gobbling disk space. IMovie '09 has made many things much easier, but if you really want to fine tune the effects and appearance of the video, trust the experts.


IMovie '09 on Apple.com

The Apple website best sums up IMovie and it's many user-friendly uses and features. They've really tailored it nicely to show all the things you can do with IMovie, but I think the most important thing about IMovie, particularly for teachers is that it can be cut to fit any lesson plan, class project (individual or in groups), and give students a sharp tech-tool to use to better enhance and express their learning in a way that's collaborative, creative, versatile, fun to use, and professional-looking.


Monday, August 16, 2010

Change of Direction This Week

First, let me start by thanking you for all of your hard work on the blog posts!  They have all far exceeded my expectations and I've enjoyed reading and learning about your topics.  I hope you all have gotten some interesting ideas about different ways to integrate technology into the curriculum from the posts.

esbjorn2, 3/23/2007, via Flickr, Creative Commons Attribution
This week we'll change directions a bit.   This assignment is an opportunity for you to explore a particular educational technology that you think will be useful for you in your future career.  What you will need to do is create a tutorial for this technology for two audiences: fellow teachers and your students.  The tutorial should last no more than 15 minutes for each audience.  So the "teacher track" should be 15 minutes and the "student track" should be 15 minutes. If I were to take both tutorials back-to-back it should take roughly 30 minutes.  Of course this is just a guideline but hopefully that will give you some parameters on the amount of content to include.

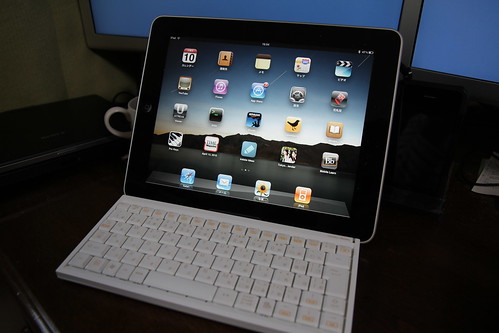
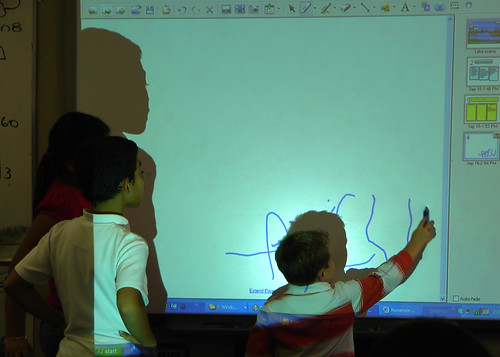
One of the pressing challenges facing many teachers is both learning new technologies and ensuring their students understand how to effectively use that technology.  For example, one problem I’m facing right now in my classes is the use of Wikipedia as a resource for research papers.  I spend a considerable amount of time teaching my students the effective use of Wikipedia as a research tool and the reasons why I do not consider it an appropriate source for college level work.

As with the blog posts please post your choice for your tutorial on the Blackboard discussion board so we can avoid duplicating work.  Beyond the basic goal of instructing other teachers and your students I would like to leave this assignment as flexible as possible.  You may choose how you wish to present your tutorial (word document, web page, youtube video, power point, etc...).  You may be able to take advantage of the technology reviewed on the blog or in your text so far this month.  Please review the grading rubric below and please let me know if you have any questions before turning your assignment.  Please include at least 5 references for your audience to get more information about your technology.  These references can be links, papers, newspaper articles, books, etc..  But not wikipedia! =)

Here are some examples of technology tutorials to use as a reference although please do not see these as limiting what you can do:

  1. How to create Talking Books in Clicker 4 (note - large PDF file)
  2. Good Guide to writing a technology tutorial.
  3. Tutorials from the University of Scranton


Please be creative and use what we've covered so far in the text and blog posts for the past two weeks into action.  Again, I don't want to limit your ideas but if you have questions if something would be acceptable or not please message me through Blackboard.   Note that while you will post your tutorial to the blog please treat this as a different assignment than a blog post - it's a tutorial on how to use technology not a blog post.

NOTE: this assignment is worth a bit more than your blog post for your grade so it should be a bit longer.  Again, each tutorial should take a person roughly 15 minutes and you are producing two - one aimed at teachers and one aimed at students.  

Content – Instructor – 10 points
___ 10 points - explained concept, appropriate for instructor use, connected to classroom
___ 6-9  points  - sufficiently explained concept, appropriate for instructor use, few connection to classroom
___ 1-4 points - somewhat explained concept, inappropriate for instructor use, no connection to classroom
___ 0 points – no answer
Content – Student – 10 points
___ 10 points - explained concept, appropriate for student use, connected to classroom
___ 6-9  points  - sufficiently explained concept, appropriate for student use, few connection to classroom
___ 1-4 points - somewhat explained concept, inappropriate for student use, no connection to classroom
___ 0 points – no answer
Presentation – 10 points
___ 10 points – Easy to follow, sufficient visual aids, clear tutorial
___ 6-9  points  - Somewhat easy to follow, may be insufficient examples, visuals helpful, sufficient tutorial
___ 1-4 points – difficult to follow, lacking examples and visuals, left confused on technology
___ 0 points – no answer
References – 10 points
___ 10 points – 5 references for user to get more information, credible, recent
___ 5  points  - 2-4 references for user to get more information, may be credible, recent
___ 0 points – no references provided for more information, not credible, outdated

Thursday, August 12, 2010

Microsoft Office or Open Office

Who doesn’t like a good deal? I cannot pass up a sale, clearance rack, or even a table of free junk because I am addicted to finding a bargain. This is where my love of Open Office started. Open Office is a free, yes I will say it again a free program that allows the user to open any Microsoft Office file as well as create a file and save it in a Microsoft Office or Open Office format. For poor college students this pulls open office into a quick lead.

But what about how each program runs and operates. This makes the competition a bit more difficult and more complex. Experts have been discussion the difference over the Internet for years and all the outcomes from each discussion seem to slightly change from year to year but in the end are all close. Microsoft Office and Open Office are fierce competitors, which seems to be creating programs that are learning and building off of each other. Most critics describe the completion as getting closer and closer every year.

Major differences seem to be in the ability to save and open programs. Open office programs can open and operate any Microsoft office program as well as save them in that format. Microsoft Office cannot say the same, which limits the program as well as it, compatibility with other programs. Some sources have even said Open Office can open older Microsoft Office programs better. The ability to open any programs makes sharing files easy and stress free.

There is also some differences in formatting text that I as a designer feel are very important like kerning and lading that open office makes more accessible and easier. This however is not an aspect that many people are actually concerned with but for me is very important. It offers a bit more freedom for formatting and design.

I think as I review the difference am realizing more and more when I am creating documents with either of these programs they both function great. I am not terribly computer savvy and when using them my end goal is to write a paper, create a spreadsheet, or review a PowerPoint slide show. For me it really comes down to my ability to create files everyone can read and open as well as cost. This makes Open office my winner!

http://www.linuxjournal.com/magazine/openofficeorg-vs-microsoft-office?page=0,2

http://www.techsoup.org/learningcenter/software/page4765.cfm


Don't Get Caught in the Web

I don't know how many times I've done research on the internet for apaper, found an amazing and very informational website, but when I go to cite it I'm not sure about the authenticity of the site. The publishing date or the last time it was updated was quite a few years ago or I'm unsure source
where the information comes from besides originating on this website.The frustration of having read the website, liked it, and then had to go and find other one could have been avoided. I needed to go into the research process with a mind set that thinks all websites are not reliable until proven otherwise. If I would start there then I might not waste my time reading websites that might beentertaining or appear informational. Learn from the mistakes I made when I was a novice web surfer! Remember, there are so many ways anyone can get information on the web that the authenticity of the information should be something you always keep in mind when searching.


Evaluate

You can start evaluating the websites before you even click on any of them by looking at the ending of the URL. Does it end in -gov, -com, -org, -edu, -net. By looking at the domain name you can decide whether you even want to look at the site.
  • edu- education
  • gov-government
  • org-organization
  • com- commecial
  • net-network infrastructure
Edu and gov sites tend to be quite reliable, but the other three you will have to look at the site more closely.

Different people will present you with a variety of ways to evaluate a website. Some have an ABCCC (Authority, Bias, Content, Currency, Consistency) process. However, all of them generally have 5 things in common. This brief video explains them in a fun fashion:


I would suggest looking for the first two things so you do not read the entire website and then find out that you couldn't use it. The last 3 things can be used while skimming and reading the site. If you keep in mind the currency, authority, purpose, objectivity, and writing style there will be less time wasted on web sites that do not have their information properly support or authentic.
Due to the easy access of the internet to all students and the frequency to which it is used in papers, there are a lot of websites, particularly colleges, that createdifferent sites. These sites even have some exercises that you can use to practice your "web site evaluation skills".

check out this wiki maintained by the EASTCONN literacy and Educational Technology Specialist. Teachers who attend her training session are allowed to join and add to the wiki. This wiki provides different worksheets and a multitude of resources on how to evaluate websites.

Rest assured that there are a lotof people out there that want you to not only receive accurate information but use for your papers or even just in every day life. If you couldn't tell most of the websites I'm sending you to for more information are colleges. We have been given a great expanse of information through the World Wide Web now all we have to do is learn how to use it correctly.


Not only must you evaluate the site but you need to format it correctly when you put it on your reference page in your paper. There are many different websites that give you information on how to create your citations. It can get confusing remembering which piece of information you need and where it goes. I know I am continually referring to different websites to ensure accurate citations. You want to make sure that your teacher or whoever might be reading your paper knows where the information came from and how they themselves could access it to verify its authenticity or learn more about the topic.

I'm going to give you information for some other internet sources as well as websites because you will run into these sites and different hits you receive when surfingthe web for information:


Write it the exact same way you would for the non-online sources; however, you will have to add two extra things: the date you accessed the site and its url. It will be added onto the end of the citation as so- retrieved ___date___, from ___url____.

2. Online Databases

You start by writing down on the information on the source as you normally would for any other cite and then also add the date retrieved along with the name of the database. It will be added onto the end of the citation as so- retrieved____date____, from___insert name of database.

You will need a variety of things particular to the website
  • the website name in italics
  • name of the website article
  • author of the source
  • date the website was created or the particular article was published (if known)
  • the date you accessed the website
  • the URL
It will need to be in this order:
Author, A. (Date Published). Article name. Name of Website. [Retrieved] Date, [from] URL of the Website.

Here, let me give you an example of one of the websites I have this blog post linked to in order to provide more information.
Reitz, J. April 5, 2010. Guide to Evaluating Web Sites. Western Connecticut State University. Retrieved August 10, 2010 from http://people.wcsu.edu/reitzj/res/evalweb.html


Now that I'm done acting like a citation machine,

Do you brave the expanse of the World Wide Web to do your research? Do you think you can evaluate a website now? Have you found other ways to specify your search so you get reliable websites? Have you learned other useful tips to evaluating a website?